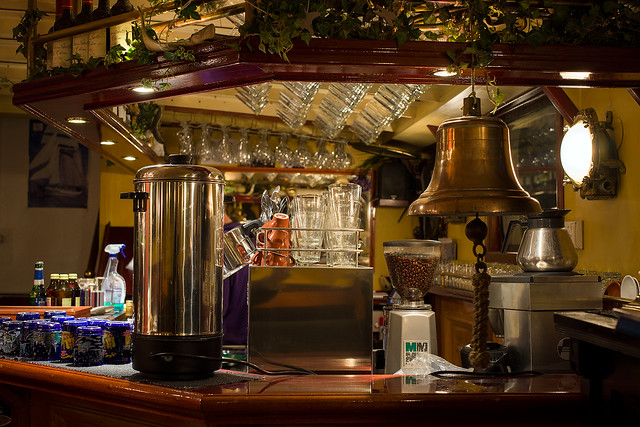
The Home of Sound Solutions Audio & Visual Equipment for Purchase or Rental Call us for a FREE Quote today: 1-800-263-0112 MY ACCOUNTNEWSLETTER HOME    Secure Shopping PA SYSTEMS & SOUND REINFORCEMENT ASSISTIVE LISTENING SCHOOL AV STUDIO GEAR MICS HEADSETS RENTALSCART Home Studio Recording Equipment 8 Steps to a Home Studio that Fits Your Recording Space and Budget  Studio Man offers some suggestions on building a fun and functional home studio – even on a limited budget in a space-challenged home. Take it away Studio Man… Studio Man at Home I have good news for our readers, clients, and guests: aspiring musicians and recording enthusiasts have finally come into their own. Twenty years ago, laying down great sounding tracks meant an intimidating trip to a pro recording studio. Even those who had the space to build their own home studio in the garage (or rehearsal space, or loft, or spare bedroom) would find themselves raiding their retirement savings for the money. Fast forward to today: digital technology has shrunk prices and rack footprints. 24 bit resolution is now commonplace; and memory capacity has greatly expanded. The result is a revolution in home recording that’s taken down a lot of pro studios and led to a flood of great music from the world’s living rooms. Your own home studio is easily in reach with these 8 simple steps: 1. Choosing a Room for Your Home Studio If you have a spare room (or a closet with a power outlet), your home studio is in business. If your room isn’t quiet, never fear. Great recordings can easily be made in less than ideal spaces. For example, if you’re laying down vocal tracks, a microphone with a unidirectional pickup pattern can minimize outside sounds. If you’re still hearing the neighbor’s barking dog, set up your digital recorder’s gated compressor to screen out the extraneous noise. Just as you don’t want to hear your neighbors, your neighbors don’t want to hear your epic fuzz guitar explorations. Fortunately, most of today’s digital recorders feature amp modeling effects that enable you to lay down a hot signal without shaking the rafters. But be sure to keep your heaphone volume at a comfortable level to avoid blowing out your eardrums. If your space is acoustically bright, covering the walls with egg cartons and heavy blankets is a time honored studio trick to reduce sound reflection and deaden the sound. Last but not least, make sure your gear fits your space. The good news is that modern digital equipment has a significantly smaller footprint than the hefty units of the past. Generally, if your room will fit a computer desk, a chair, and a printer, it will also comfortably fit your home studio. To sum it up, don’t sweat over trying to find the perfect sound environment. With modern equipment, almost any room can function as your studio. 2. Pick a Digital Multitrack Recorder for Your Home Studio If you’re looking for a quick and easy way to jump right into recording, the home studio solution of choice is the stand-alone digital multitrack recorder. AudioLinks.com offers a wide range of these recorders. Generally, a digital multitrack recorder looks a lot like a standard mixer. Modern digital multitrack recorders feature basic onboard mixing capabilities, but also offer so much more. Multitracking capabilities of analog machines were limited by the size of the tape. For home studio cassette recorders, 4 tracks were typical, and 8 tracks were state of the art. In today’s digital world, multitrack recorders store data either to a disk, a flash card, or even a computer. 8 tracks are now the ground floor standard, but digital recorders boasting 16, 24, or even more tracks are common. Almost every digital multitrack recorder also includes onboard FX so you can start your rough mix even as you record. Recording is a snap with a stand-alone digital multitrack recorder. For example, a 16 track recorder will allow you to isolate your vocals, drums, bass, and much more without any loss of sound quality. Virtual tracks are a feature of almost all digital multitrack recorders. With these, you can cut, copy, and paste segments of audio on the fly, making drum loops or backing vocals a breeze. Multitrack digital recorders are good to go right out of the box, can often record at better-than-CD-quality 24 bit resolution, and weigh about as much as your average CD player. Better still, they’re highly portable, which means potentially any room in your house can become a home studio. If you want to start with the basics, the Zoom HD8CD Multitrack Recorder or the Tascam DP02 are both great for solo musicians laying down demo tracks. For beefed up memory, simultaneous recording of up to 8 tracks at the same time, and 16 track playback, consider upgrading to the Zoom HD16CD digital multitrack recorder. If you’re recording a full band, or are planning on expanding your studio to its fullest potential, go for a machine that will fulfill your needs and then some. The Tascam 2488NEO 24 bit 24 track hard disk recorder is a top of the line machine. The 2488NEO features 24 track playback, 250 virtual tracks, and better-than-CD quality 24 bit sound in its extensive toolkit. 3. Take Your Home Studio on the Road with Portable Recorders A new twist in home studio recording are handheld digital recorders with flash drives which make portable recording convenient and fun. If you plan to record your gigs, or if you want to make basic stereo (or multitrack) demos in a separate rehearsal space, the portable digital multitrack recorder is a good solution. Simply import your auido data from your portable recorder into the standalone unit or software suite you’re using in your home studio. For a fraction of the cost of the clunky analog tape recorders of past decades, you can purchase a full-featured portable digital recorder boasting high fidelity microphones, surround sound, and multitracking capabilities. Better yet, the integrated design of today’s portable recorders insures years of rugged use. The Zoom H4n Handy is a great entry-level machine, and also sports 4-track playback and effects modelling – two popular features that are great for musicians. Or for a few dollars more consider the Tascam DR1 Portable Handheld digital recorder – an AudioLink Best Buy. If you’re looking for a higher end portable deck, the Tascam HDP2 high resolution portable stereo recorder is a top-of-the-line machine featuring built-in timecode, road-ready construction, and Firewire jacks for the speedy transfer of multitrack audio files to your home studio. 4. Equip Your Home Studio with Studio Microphones With a host of great sounding microphones by manufacturers like AKG, Nady, Shure, and Sennheiser, you can get warm sounds out of your home studio’s pile of digital gear without having to shell out big bucks for consecutive serial-numbered vintage condensers. Here are a few pointers for picking out a mic that best fits your needs: Go wired. Vocalists love the mobility of wireless mics, but many have noise-damping and reception improvement features that can complicate home studio recording. Get a mic that’s adaptable. Not all mics fit every task: a unidirectional mic designed for a guitar amp might sound strange as an overhead. At least one mic in your studio should feature a switchable pickup pattern and a flat frequency response for maximum versatility. Think of what you’re recording. Wide-diaphragm condensor mics have a robust dynamic range that can capture acoustic combos with crystal clarity, but for amplified instruments you’ll need a more hardy dynamic mic. Check your microphone’s power requirements. Many pro mics require a power source, and while some have batteries, most of the time you’ll need a phantom power supply from your home studio’s digital multitrack recorder. Although this is a common feature, make sure it’s there before you buy the wrong mic. Consider a preamp. Most digital multitrack recorders supply adequate gain to boost the volume of any mic, but a good tube preamp can shoot your home studio sound into the stratosphere. When stocking up on mics, grab the workhorses. The classic home studio choice is the Shure SM58. It’s not only great for micing both vocals and amps, but also is adaptable to most other applications. For recording vocals in high-volume situations, the ideal choice for band vocalists is the Sennheiser E845. The Nady RSM 2 Platinum ribbon mic or the AKG C3000B studio condenser are particularly savvy choices to put at the heart of your home studio and cost a fraction of what you’d expect from audiophile mics. They are especially nice for capturing the nuances of acoustic performances. 5. Playback in Your Home Studio Using Headphones Now that your home studio has everything you need to get your sounds onto disk, you need a way to get them back out again! Absolutely essential in any home studio set up is a reliable pair of headphones. You’ll need them not just to play back finished songs, but also to monitor playback while overdubbing, when it’s vital that your old tracks don’t bleed into the new ones. A comfortable, lightweight set of cans to cover the ears and a wide dynamic range are both key features to consider. The human ear can hear everything from 15hz to 18khz so your headset must be able to reproduce this range (and beyond) without distortion. The Nady QH 660 will satisfy many of your monitoring needs at a great price. Be sure to keep a few on hand for sessions with multiple musicians, or friends and family who want to sample your sound! The sturdy and lightweight Samson CH 700 headphone is another solid choice for marathon mixing sessions. Craving more bass in your headphones? Try the Sennheiser HD 202 closed back headphones which feature specially designed turbine diaphragms that deliver more low-end punch. If you’re looking for pro fidelity and a full sound spectrum (or if your headphones will be your main monitoring system), upgrade to a set of AKG K171 closed back studio headphones. 6. Playback in Your Home Studio Using Monitors Headphones can give you only part of the picture, and they’re crucial for picking out close-up sonic details. But since they eliminate the acoustic space between the speaker and the ear, your mix may sound thin and unbalanced if you don’t fill out the sound with a good pair of stereo studio monitors. When positioning your monitors, be sure to save yourself a seat at the sweet spot. If your monitors are 6 feet apart, sit 6 feet away, at the apex of the triangle formed by your chair and the speakers. In a smaller space, simply shrink the triangle. Monitors can be either unpowered or powered. Unpowered monitors require an amp, while powered monitors integrate the amp into the speaker design. For sheer space economy, powered monitors are a great solution for a beginning home studio. The Samson Resolve 40a active monitors are compact, versatile, and priced to fit any budget. If you’re hungry for more power and bass, the Samson Resolve 65 studio monitors pack a full 50 watts and larger woofers. For maximum fidelity and bass response, a great monitor choice is the Tascam VLA5 powered monitoring system. An investment in these active monitors will repay your ears with true reproduction across the spectrum. A good set of headphones and monitors for your home studio can make the difference between a great and an average mix. 7. Get Your Mix Ready for Others to Hear You’ve recorded a stellar set of performances, swinging solo overdubs, and nailed the vocal tracks. Now it’s time to pull it all together with a killer mix and let the world share your creation. Chances are your digital multitrack recorder has everything you need to create a great mixdown so in a basic studio set-up you do not need additional equipment. But if you want to make a pro quality final mix, you may want to invest in a professional mixdown deck. These can be either rackmountable or standalone, and can record to a variety of media – usually blank CD’s or compact flash cards. AudioLink offers a selection of mixdown decks to suit a wide range of needs and budgets. The Tascam CDRW800SL is a great choice for basic mixdowns featuring CD burning capabilities as well as a pitch control for last-minute corrections. For easy transfer of sound files to a computer, consider the Marantz PMD570 solid state digital recorder, which makes transferring your data as simple as plugging in a USB cable or inserting a flash card. If you really want to take your sound to the highest level, check out the Tascam DVRA 1000 HD recorder. This amazing deck not only features 24 bit sound, a 60 GB hard drive, and a 192 kHz sampling rate, but also can burn DVD’s in Sony’s revolutionary Super Audio CD (SACD) format! 8. Stock Your Home Studio with Cables, Stands and Blank Media With all the money you save by not having to soundproof your attic or align the heads of your reel-to-reel deck, remember to fully stock your home studio. Microphone and guitar cables are essential and often overlooked- until you’re pulling your hair out looking for an XLR cable to plug in your mic. Microphone stands will spare you a lot of frustration, especially if you need to mic up drums or acoustic instruments. Boom stands are the most versatile choice. It’s nice to have some guitar stands on hand too. While you’re at it, grab Firewire cables and any other computer cables you need. Extras are fine – you’ll thank yourself later. One more thought. Perhaps you’re making a CD for your band to sell at gigs. A standalone or rackmountable CD duplicator makes it easy to burn multiple copies for the road, and will help repay your investment in studio equipment. You’ll also need some CD’s and jewel cases – AudioLink is currently offering these on special! Conclusion With these 8 steps and all the artistic inspiration and talent you have at your disposal, your home studio is stocked with everything you need to create pro quality demos, songs, and albums! But there’s a whole world of enhancements, upgrades, and peripherals available from AudioLinks.com – The Home of Sound Solutions. Be sure to check out our selection of home studio gear, including digital multitrack recorders, portable recorders, microphones, headphones, and monitors. Feeling overwhelmed by all the options? Our consultants are available at 1-800-263-0112 from 9 a.m. to 6 p.m. EST to help you pick the recording equipment that best suits your needs and budget! FREE Consultation: 1-800-263-0112       CATALOG  MANUFACTURERS  SPECIALS  DEAL OF DAY  FREE SHIPPING  GIVEAWAY  REVIEWS  GUIDES CONFERENCE SERVICES  TERMS & CONDITIONS  PRIVACY POLICY  ABOUT US  CONTACT US  SITE MAP Copyright 1996-2014 AudioLinks, LLC. BACK TO : HOME / BLOG / Home Studio Recording Equipment
Wednesday 24 December 2014
Saturday 20 December 2014
How To Use MIDI In An All Hardware Setup
Posted on December 20, 2014

Many people are going to look at the recently introduced Novation Launch Control XL as a cool MIDI controller for Ableton Live.
But the fact that you can edit what each knob, slider and button does means that it can be repurposed to do almost anything.
In the video below, Novation’s Chris Calcutt demonstrates using the Launch Control XL as a control center for an all-hardware setup. Calcutt flies through his discussion, but it highlights the importance of the 30 year old MIDI standard and how it lets you assemble complex rigs that combine new and old hardware and software:
In the demo, he uses an Elektron Octatrack to control his Novation Bass Station IIand Novation UtraNova. He uses the Novation Launch Control XL to control the volumes of all the Octatrack’s audio tracks.
“This hardware-based setup….lets me generate all the sounds and perform the music using nothing but hardware, instead of a computer,” notes Calcutt. “It’s incredibly liberating: it’s totally self-sufficient and the workflow of the Octatrack means I play it like a real instrument. I just turn on a bunch of gear and start making music; it’s almost playing in the traditional acoustic way. It’s a real joy!”
Bokeh Dreams from 21mm to 135mm with Sony A7 & A7R
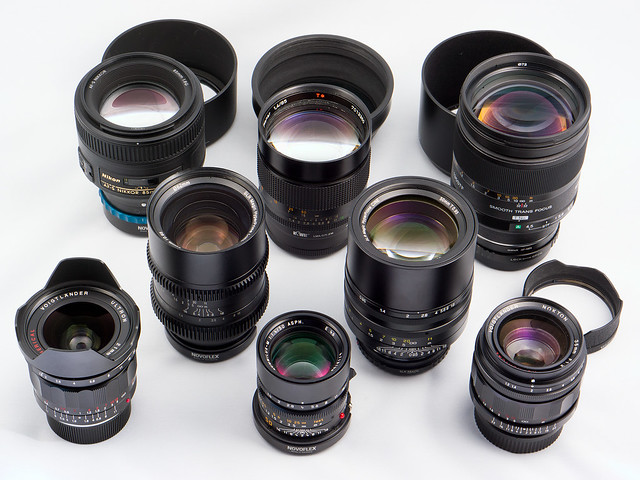
Dec. 2013 - Since the new full frame mirrorless "ILCE" cameras (A7 and A7R) from Sony were presented in October, thanks to its small flange distance many users where thrilled by the option to adapt nearly every lens. In the wide angle range, there was quite a lot of frustration, but another article here shows some of the best options in the UWA range. In this article we will focus on lenses that give you great "virtual 3D" options to seperate objects by playing with depth of field (DOF) and beautiful bokeh.
This article will cover the following lenses (downwards sorted by focal length and maximum aperture):
- Sony STF 135mm f/2.8 T4.5
- Carl Zeiss Planar T* 85mm f/1.4 (with Contax/Yashica mount, MM version)
- Nikon AF-S Nikkor 85mm f/1.8 G (2012 model)
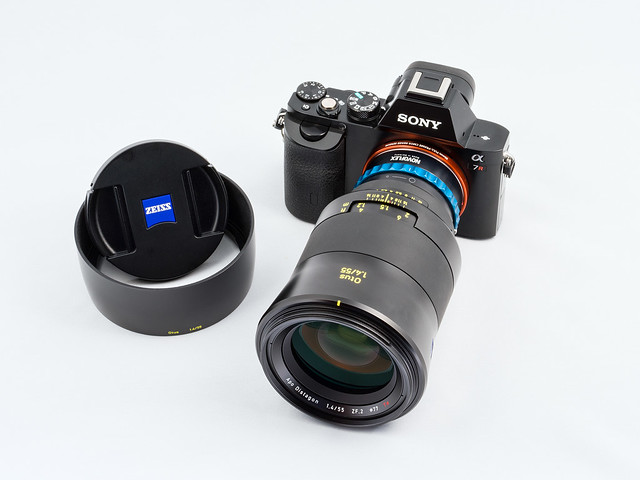
- Zeiss Otus APO Distagon T* 55mm f/1.4 (ZF.2 version)
- Zeiss FE Sonnar T* 55mm f/1.8 (not shown in the collection above)
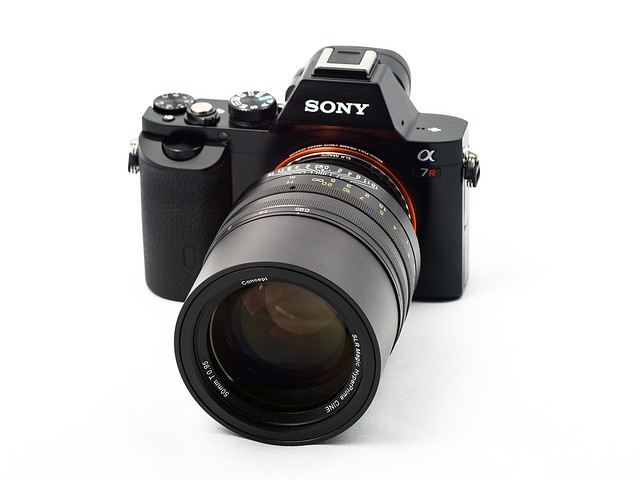
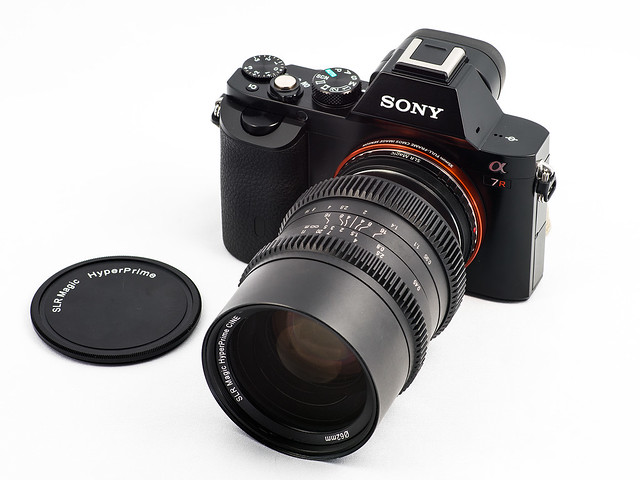
- SLR Magic HyperPrime CINE 50mm T0.95
- Leica Summilux M 50mm f/1.4 ASPH
- SLR Magic HyperPrime CINE 35mm T0.95
- Voigtlander Nokton 35mm f/1.2 ASPH
- Voigtlander Ultron 21mm f/1.8 ASPH
135mm

(click on image to see other sizes)
Due to its very specialized construction, this lens fascinated me since a long time but its focal length was a bit long when used on crop sensors (APS-C, FourThirds etc.). The full frame sensor of the Sony A7R changed the game...
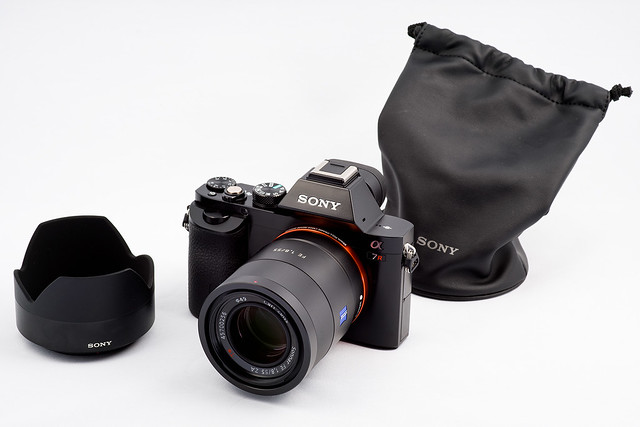
This is, how it looks like on the Sony A7R:

From the photo above you can already see the double iris construction, from which the front one is designed to produce perfectly round shaped circles of confusion of hightlights outside the focal plane. Between the sets of aperture blades this lens has a special "apodization element", a kind of circular ND filter that reduces to its borders the intensity of light rays the more they are out of focus. This design gives an extremely smooth transition to the blurred out-of-focus regions and boosts sharpness inside the focal plane. If you are interested in more details about this masterpiece with a weight of 730g, you should take a look into this review: Sony 135 F2.8 [T4.5] STF SAL-135F28 review.
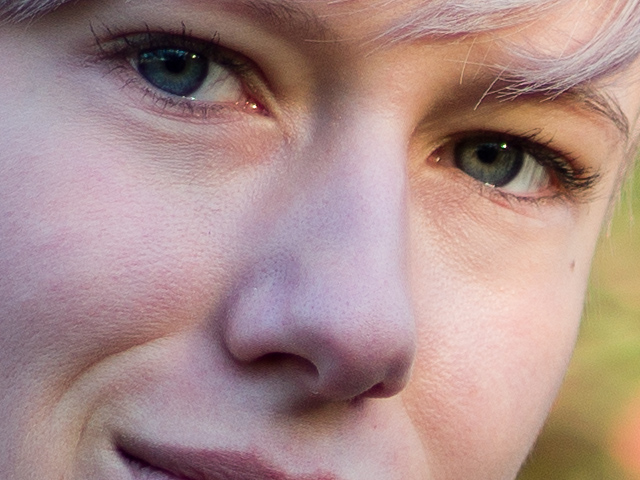
The achievement of this effort is visible in this 1:1 crop (100 actual pixels) from the portrait shown above:
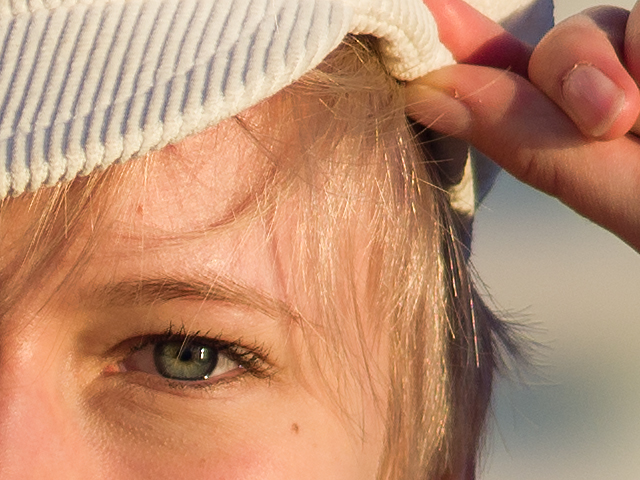
As this lens is pureley manual, it can be adapted using a cheap A-Mount (or Minolta AF) to E-Mount adapter without electronic signal transmission. If you use this lens in low light situations, please be prepared that the apodization element absorbs some light, Sony evaluates its transmission to T4.5 when used at open aperture.
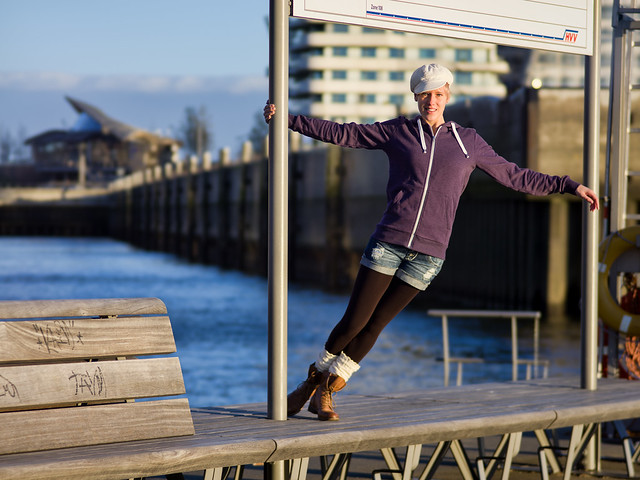
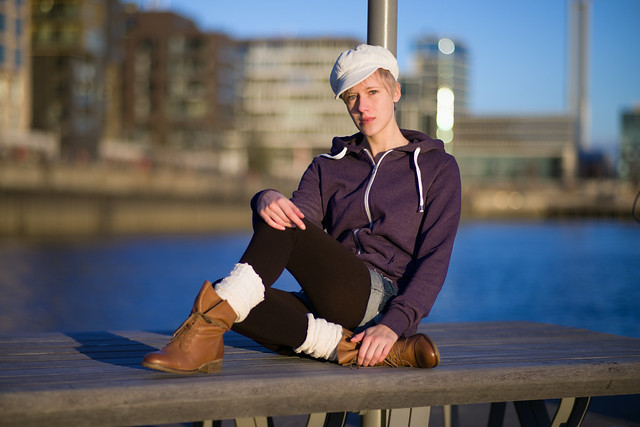
Some further examples taken with that lens demonstrating the usage of the front iris:
Transmission set to T4.5:

Transmission stopped down to T6.7:

Again fully open (f/2.8 / T4.5):


85mm
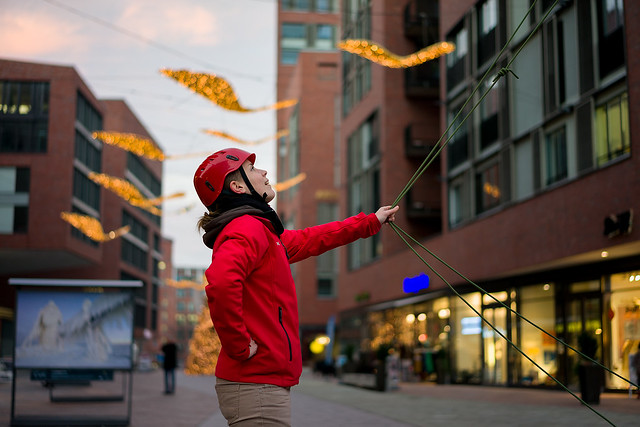
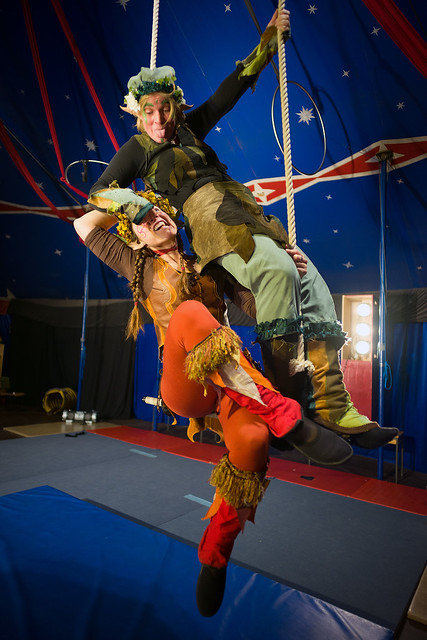
OK, time to go to get a bit closer with the next lens, the Carl Zeiss Planar T* 85mm f/1.4 (for Contax RTS / Yashica mount). There were two versions of that lens, the AE and the MM version, both weigh about 595g. From AE to MM version, mainly the shape of the aperture blades was changed, because blurred out highlights in images taken with the AE version stopped down looked somehow like circular saw blades. As long as you use the AE version wide open, there should be no noticable difference. The MM version can be identified by a green "16" on the aperture ring. This photo shows the lens mounted to the Sony A7R:

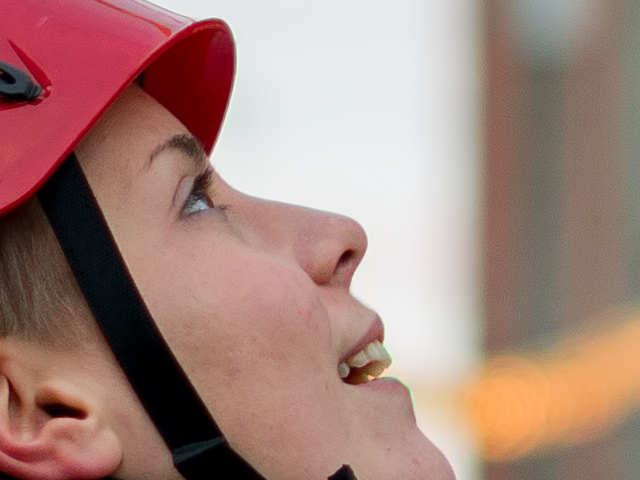
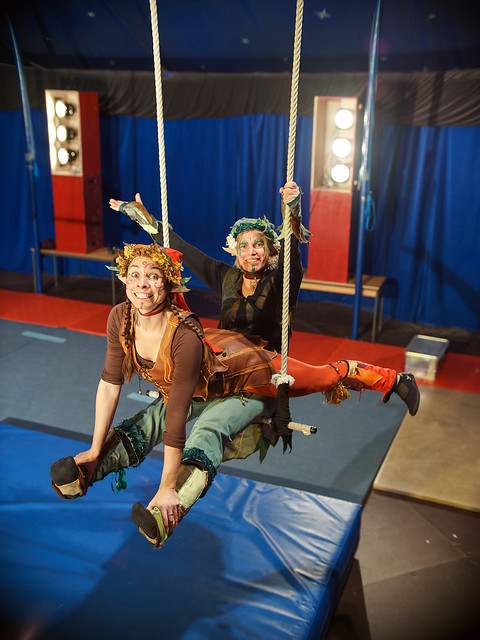
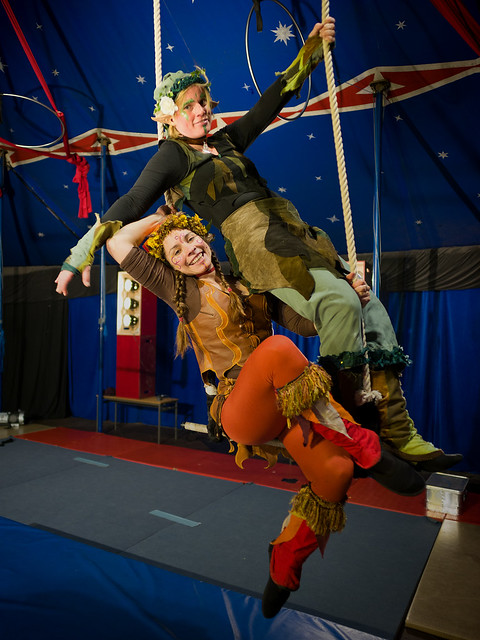
Some examples showing the characteristics of this lens - all taken with open aperture (f/1.4):

A video from these "girls on fire", that was recorded in major parts with the Zeiss 85/1.4 can be seen here:
Further examples at F1.4:


(click on the images to see other sizes)
If you want to travel a bit lighter but still with a bright 85mm lens, the Nikon AF-S Nikkor 85mm f/1.8 G (the new 2012 model) may be interesting for you as well. It weighs only 350g but has about the same size like the Zeiss Planar T* 85/1.4 shown above. To adapt it to the Sony A7(R) you need an adapter with an additional ring driving the mechanical aperture coupling. This is, how it looks on the A7R:

The lens produces a nice bokeh as well and is incredibly sharp right already wide open at F1.8:

To understand, what I mean with "incredibly sharp", look at this 1:1 crop (100% actual pixels):
Some further examples:
100% crop (actual pixels):

As both of these examples were shot with the Nikkor 85/1.8 under comparable conditions to the corresponding shots with the Zeiss 85/1.4 you can use their full resolutions (that you can reach by clicking on the images) for direkt comparison.
50 - 55mm
OK, time for the classical focal length, the "adorable 50s". We will start this range with the awesome Zeiss Otus 1.4/55, an apochromatic corrected Distagon design with Zeiss famous T' coating. It is used with manual focus, weighs about 1kg and the ZF.2 version (for Nikon mount) contains an additional aperture ring.
Here is a first shot at F1.4 (for comparison with the Leica Summilux 50mm f/1.4 ASPH see below):

...and a 100% crop (1:1 actual pixels):
The Otus shows an impressive resolution and micro contrast already at open aperture and delivers excellent results across the whole frame. You will see more from that formidable lens here at 3D-Kraft.com
Next candidate - also from Zeiss, also 55m focal length - is the brand new "native" full frame prime lenseZeiss FE Sonnar T* 55mm f/1.8:
Although there was a lot of praise already in advance, I was curious to see its quality by myself. When Sony says "what matters is having top quality in a 'not to big' sized lens" , this lens may be a good example. It is already very sharp used wide open with a beautiful and smooth bokeh and has a quick and accurate AF. Size and weight perfectly match the concept of the Sony A7/A7R.
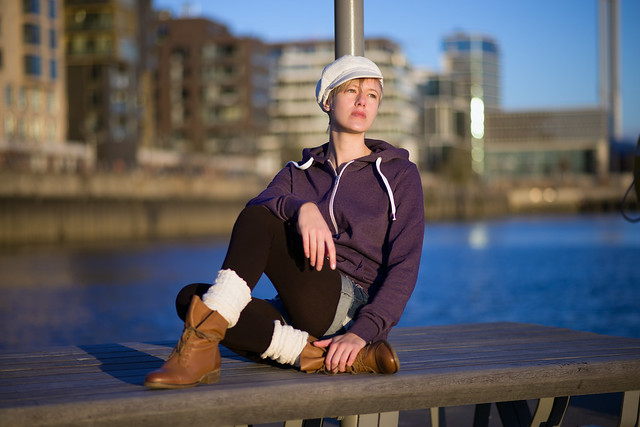
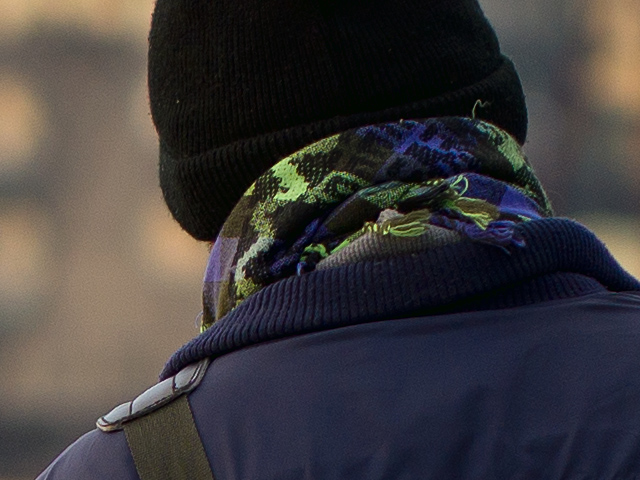
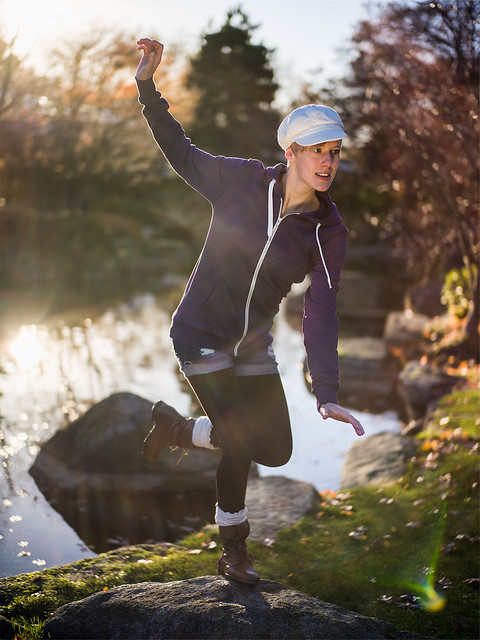
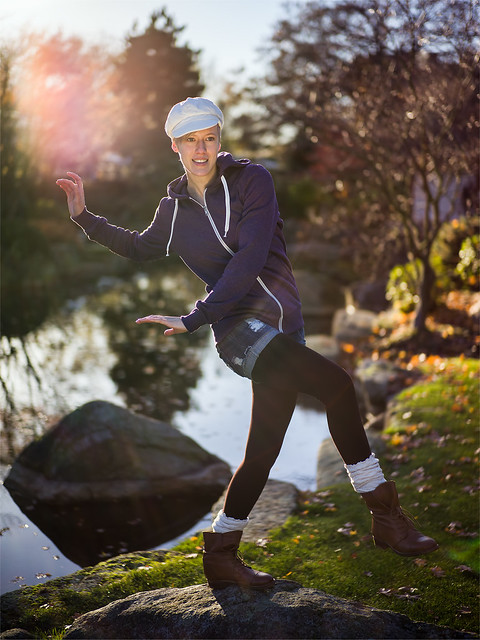
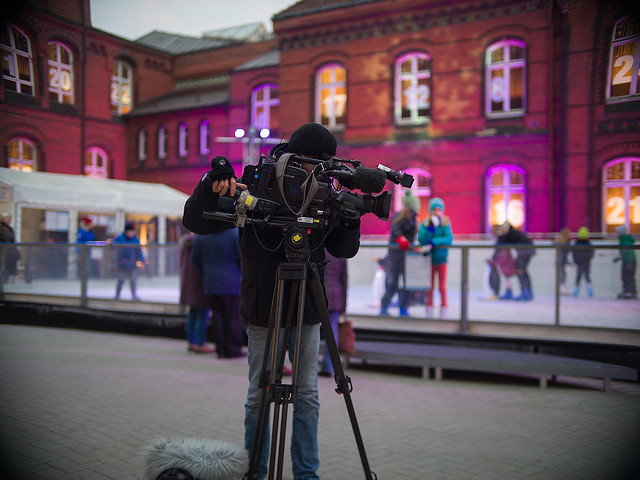
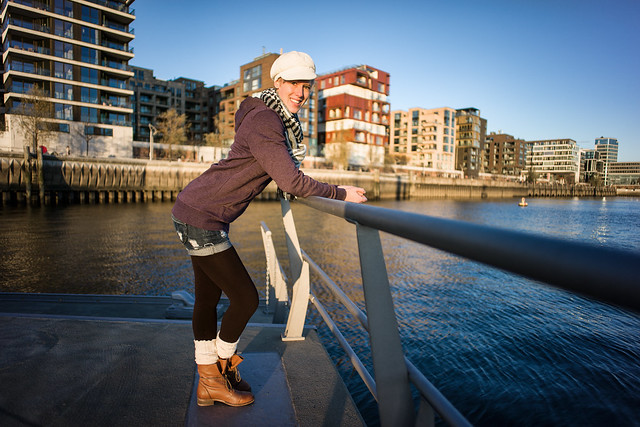
Example at open aperture (F1.8), hand held at 1/60s:
"Schattenspringer" in action...
100% crop (actual pixels) from that shot:
Some more examples:
F5.6:

F1.8:
Although this article is more about bokeh, you may be interestedt in the sharpness across the whole frameof that lens at F5.6.

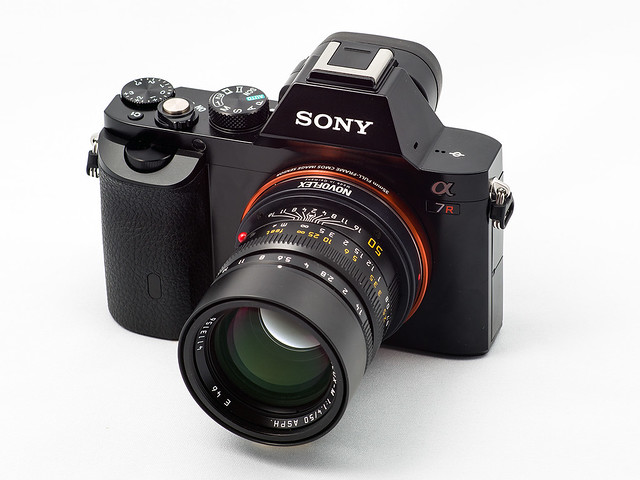
The next "adorable 50" is the SLR Magic HyperPrime CINE 50mm T0.95. This lens appeared early 2012 on the market in two versions. Both are optically and mechanically identical, have an M-mount and weigh about 1kg. The RF version is calibrated to be coupled on rangefinder cameras like Leica M9, MM or M240. Due to its extreme shallow depth of field, when shot at open aperture (and that's why you buy such a lens!) the summation of all tolerances may produce unwished results, so SLR Magic decided to offer this RF coupled version only directly in Hong Kong when you bring along your rangefinder camera for individual calibration of that lens to your particular camera. The CINE version does not require that elaborate procedure, so you can get it also shipped to other countries at a very attractive price compared to its competitor, the Leica Noctilux 50mm f/0.95 ASPH. There is a direct comparison between these lenses here on 3D-Kraft.
Some examples at open aperture (T0.95 / F0.92), shot hand held:

This is a 100% crop (1:1 actual pixels) from that image:

Some further examples, all at open aperture:


Playing around with backlight and flares:
Ok, time to stop down to F1.4 ;-) - a more compact alternative is the Leica Summilux 50mm f/1.4 ASPH, one of the most adored lenses in the Leica M system. It provides excellent center sharpness right from open aperture and one of the creamiest bokehs I have seen so far in the 50/1.4 sector.
Here are some examples at open aperture (F1.4):


Playing around in backlight with flares:
(click on the images for other sizes / resolutions)
Another bokeh comparison (comparable photos were show above with the Zeiss FE 55mm f/1.8).
F5.6
F1.4:
And another bokeh shot with the Leica Summilux at open aperture (no vignette correction) for comparison with the Zeiss Otus 1.4/55:

...and a 100% crop (1:1 actual pixels):
If you compare this image to the image from the Zeiss Otus 1.4/55 shown earlier, you see that both deliver excellent sharpness already at open aperture but the Otus delivers even more micro contrast and a significantly more evenly performance all over the whole frame (less vignetting than the Summilux, less field curvature).
35mm
Now let us take a look to some 35mm bokeh lenses. The most extreme contruction in this range is currently the SLR Magic HyperPrime CINE 35mm T0.95, available since March 2013. Although it comes with an M-mount, it is not designed to be used on a Leica M body or a Ricoh GXR M-mount modul, because its large rear lens element will not fit into their throat. It is meant to be used adapted to cameras with crop sensors like Sony NEX or Fuji X and depending on your order it will be shipped together with an adapter to that system. The idea here is to save your invest when you swap between these systems by just replacing the adapter. You can find an indepth review on Sony NEX-7 here at 3D-Kraft as well. Conquering The Darkness - SLR Magic HyperPrime CINE 35mm T0.95 Comparison.
So why did I decide to include such a crop lens design also in this article? The answer is given by these images which are only cropped to 4:3 aspect ratio and processed with some vignette reduction:
So you see, like no other 35mm focal length this lens provides you an incredible option to play with object sepration by depth of field with acceptable loss by cropping.
If you are searching for a 35mm lens that can be used without cropping and if you can live with "only" f/1.2 maximum aperture, the lens of choice for you may be the Voigtlander Nokton 35mm f/1.2 ASPH. In 2011 it was replaced in 2012 by a "version II". When I compared a sample of the new version to my previous version I sample, I decided to keep the version I but it may be possible that I only was unlucky to receive a bad copy of the version II lens (looking more "milky" at open aperture and with less creamy bokeh). This image demonstrates the different sizes:

(size comparison from left to right: SLR Magic HyperPrime CINE 35mm T0.95, Voigtlander Nokton 35mm f/1.2 ASPH II, Voigtlander Nokton 35mm f/1.2 ASPH I)
At the moment, I have only one shot takten with that lens on full frame (shot at open aperture):
If you are interested in further 35mm comparisons, but shot on APS-C crop (NEX-7), please look here:Adorable 35s - Big 35mm Speed Lens Comparison (Leica, SLR Magic, Mitakon, Canon + Speed Booster, Samyang)
21mm
Last but not least in this bokeh-maniac-series, is the Voigtlander Ultron 21mm f/1.8 ASPH. This is how it looks on the A7R:

This lens was already covered in more detail in my article about the "UWA lenses that work on Sony A7/A7R". So here I will only provide some examples taken at open aperture that demonstrate the options to play with DOF even at such a wide angle at an reasonable price (of course the Leica Summilux 21mm f/1.4 ASPH adds some bokeh options but it's price made me too dizzy...):
F1.8:
(click in the image to see other sizes. You may determine some field curvature with that lens)

Thanks to Kimi and Duo Flammenspuk!
Subscribe to:
Posts (Atom)